
So your little prince (or princess!) wants to be a zombie for Halloween this year huh? This might be exciting for some of you, and not so exciting for others. Either way I’m here to show you a super easy way to do some quick zombie makeup for kids that you and your kids will love! This while makeup took me about 30 minuets to put on, and came off super easy when I was done! The best part is I only had to buy 2 things from the store, the rest of what I used I already had at the house! That big “wound” on her head? It’s toilet paper! So are you ready?
Here is what you will need for this Zombie Makeup for Kids:

- A Halloween cream makeup pallet. (I got the one pictured which included the mail color pallet, fake blood, makeup crayons, and sponges for $5 at WalMart!)
- 1 ply TP. No need for fancy stuff here, get the cheap stuff!
- Liquid Latex. (you could also use elmers glue, but it will take longer to dry.)
- Foundation
- Toothpicks, or you could use anything that can safely poke holes in the TP.
- Black eye shadow
Here is how you apply this Zombie Makeup for Kids look:
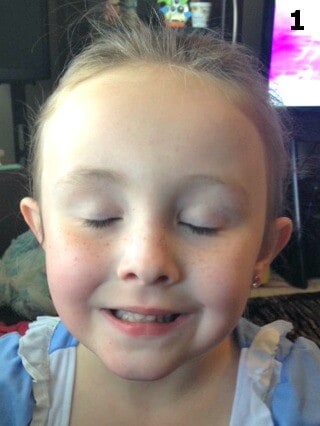
Step 1: First start out with a fresh face clear of makeup or lotion. Make sure long hair is pinned back and out of the way!
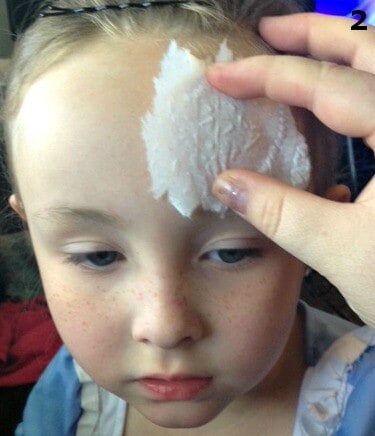
Step 2: Take your 1 ply toilet paper and rip it unevenly, fitting it to your childs face where you are wanting your “wound” You will make 3 different pieces of TP, each one slightly smaller than the first.

Step 3: Next take your liquid latex (or glue) and pat over the space you have chosen for your wound.

Step 4: Lay your TP on top of your liquid latex, and then add another layer of latex, then your smaller piece of TP, and then again for the 3rd. Let dry completely. (about 3 minuets for liquid latex, and 5 minuets for glue).

Step 5: Next you will want to take your tooth pick and poke some holes through the layers of TP, be careful not to break the skin! I find going in sideways rather than strait down works out better  Make as many or as few of these as you want.

Step 6: Once you have your holes down, cover your “wound” with foundation that match your childs skin tone. Make sure to blend it well.

Step 7: Take out your makeup palette and get a clean sponge. Combine the black, brown, and red color on your sponge and dab the combination of colors around your “wound” blending as you go. (I did this on my hand first so I could get the color combination right so I could achieve the color I wanted .)

Step 8: Take your red makeup crayon and go inside the holes you created earlier and color them in.

Step 9: Go around the inside of your “wound” and dab on some purple with your finger LIGHTLY. This will create a bruising effect. Also with your finger, dab on some fake blog in and around the wound. Even when it dries it looks “wet” and is a nice gross out effect

Step 10: Now that your wound is done, it’s time to work on the rest of the face! I added some black eye shadow around the eyes, and took my sponge and dabbed some of the black cream makeup around the cheeks and mouth. I also added some fake blood on the lips and mouth.

Brainssssss!
A Big thanks to my awesome daughter for being an awesome model


Pawliss 9 Feet Giant Spider Web with Super Stretch Cobweb Set


Happy Halloween,Trick or Treat Balloon and Broom Ghost Skulls Pumpkin Banner


Prextex Animated Sitting Grim Reaper Skull Scare Crow Best Halloween Decoration Prop


Silicone molds,LKE Muffin Pan Halloween Limited Edition


Halloween String Lights, 13 Feet 40 LED 3D Jack-O-Lantern Pumpkin Lights
Looking for other great Halloween makeup looks for kids? Check these out:

Easy Halloween Sugar Skull Make Up for Kids

Easy Halloween Makeup for kids: Peacock edition


Comic Book Character Make up for Kids

Zombie Brains Halloween Green Macaroni and Cheese Recipe
The post Zombie Makeup for Kids appeared first on Real Advice Gal.


